Get Started
Before starting with OpenWear, you need to prepare the environment for writing code. OpenWear Core supports programming with both Arduino and MicroPython, so you can choose the language you are familiar with to write your code.
Preparing the Programming Environment
Using Arduino
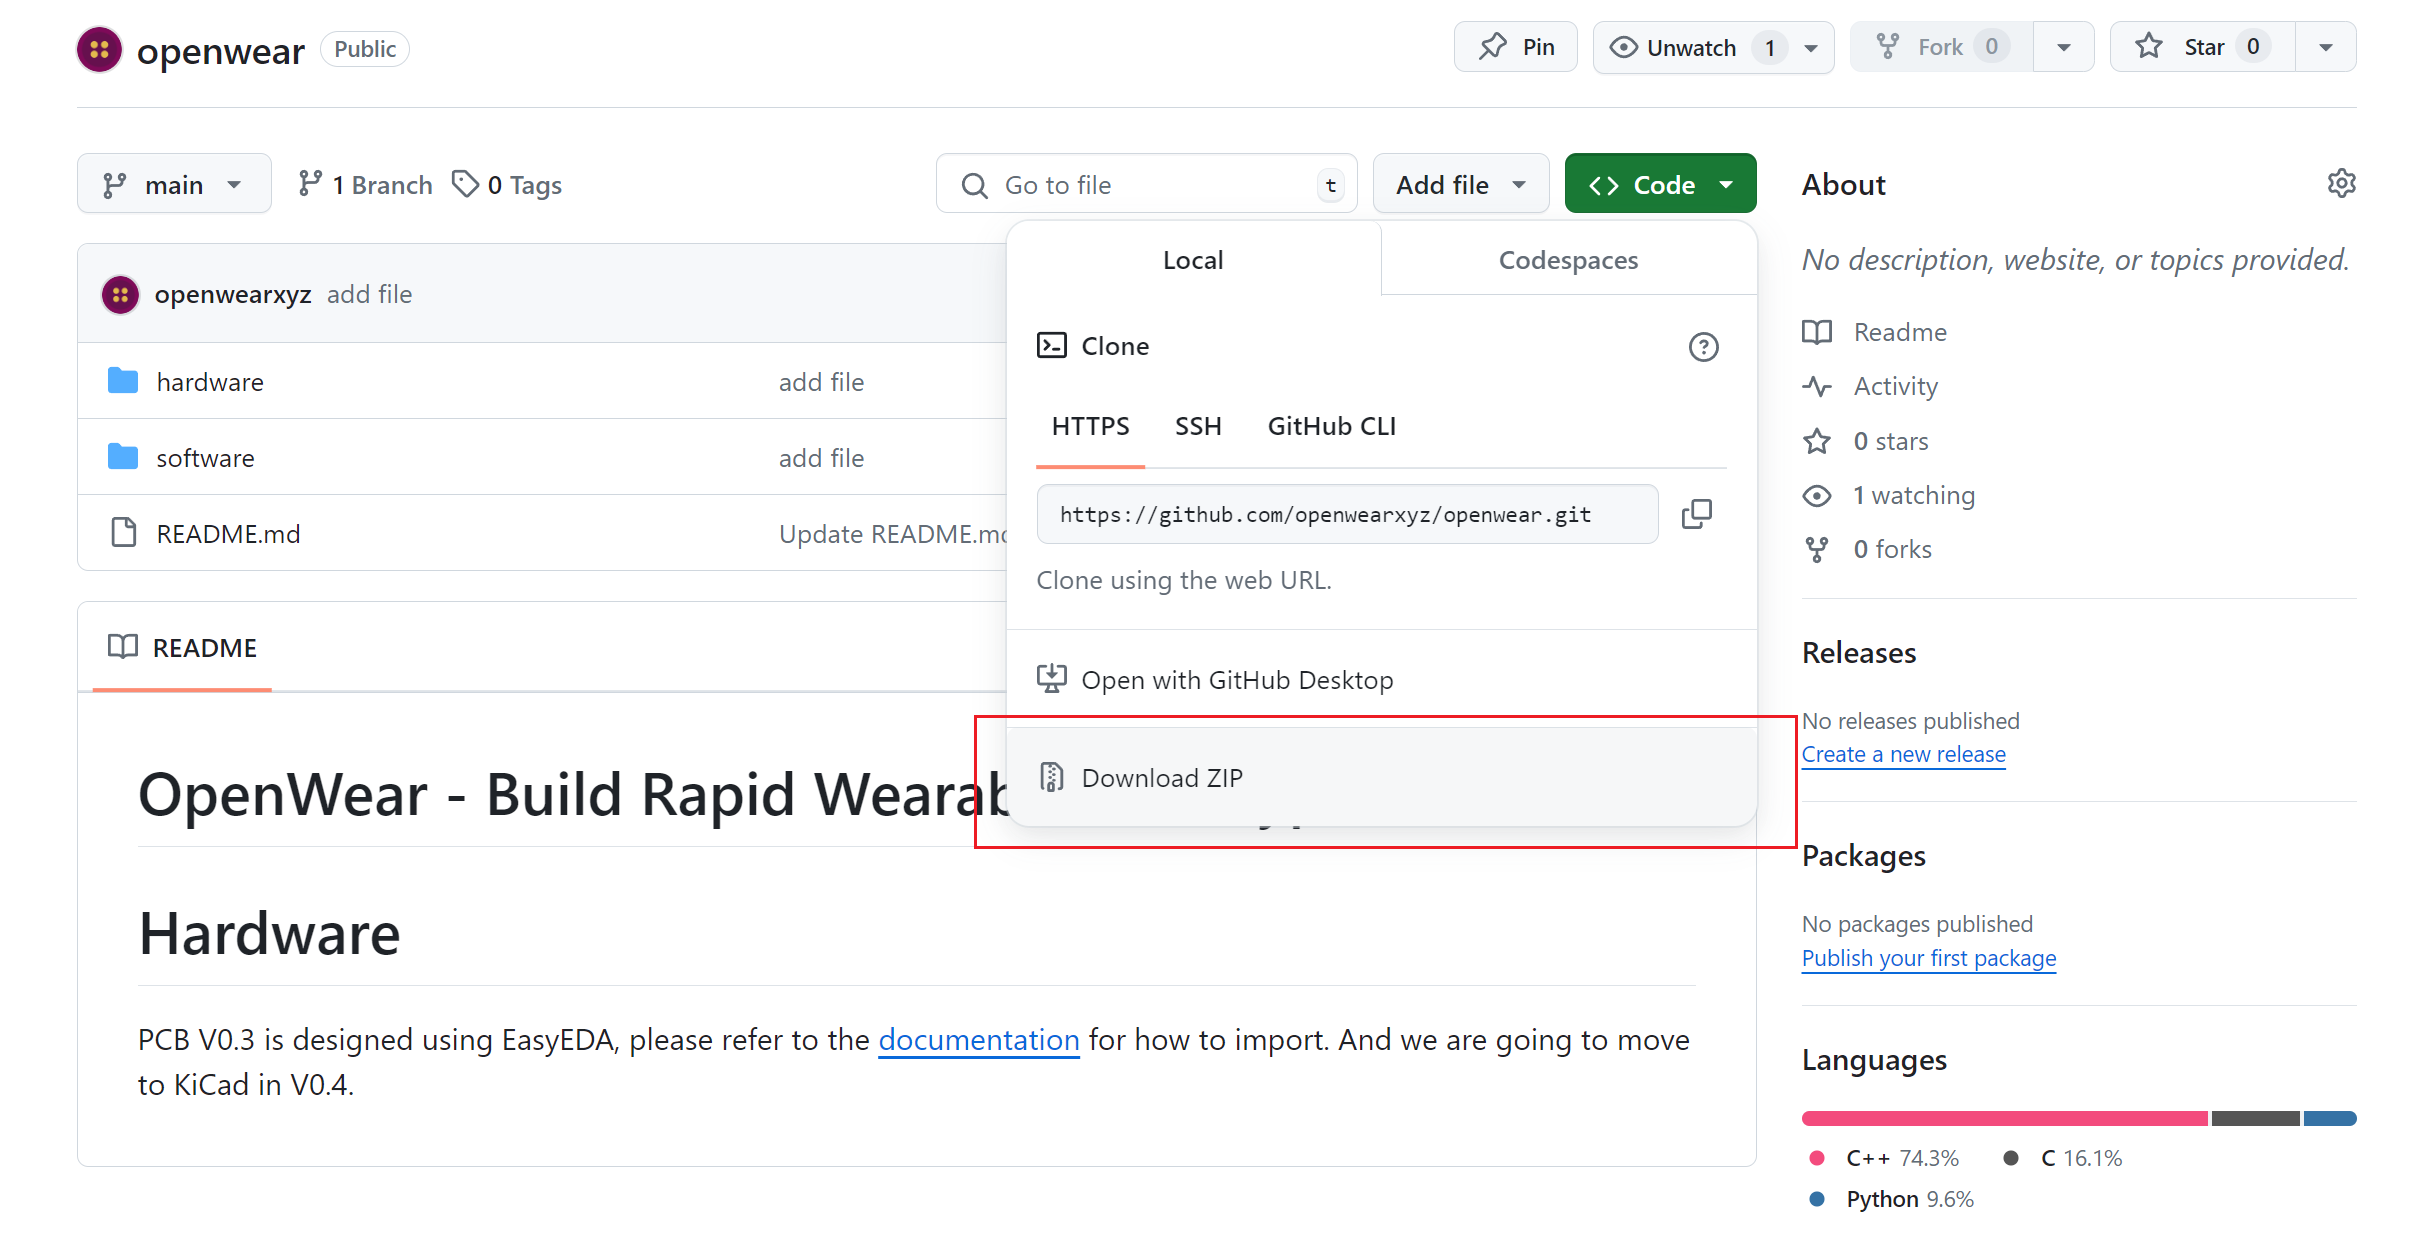
To write code with the Arduino IDE, you first need to download and install the Arduino IDE. If you have not yet installed the Arduino IDE, please visit the official Arduino website for download and installation. After installation, visit the OpenWear GitHub repository and download the source code (click Code -> Download ZIP). After extracting, you will find a folder named software/Arduino Board ESP32 Variants.
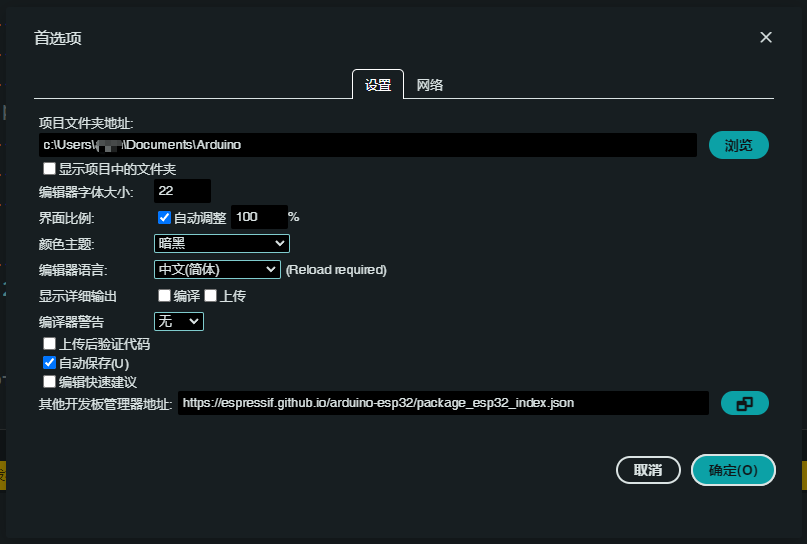
After installing the IDE, the next step is to install the ESP32 development board support package.
- For Windows systems, click
File -> Preferencesin sequence; - For macOS systems, click
Arduino IDE -> Preferencesin sequence.
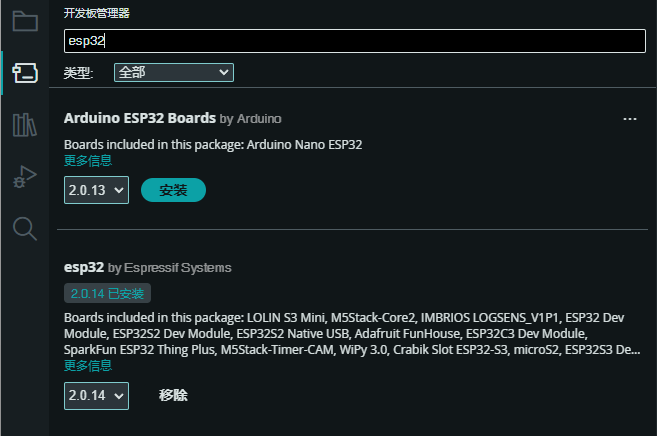
Enter https://espressif.github.io/arduino-esp32/package_esp32_index.json in the "Additional Board Manager URLs" field. Then open the Board Manager, search for esp32 and install it. For detailed installation steps, refer to the Espressif official tutorial.
After the installation is complete,
- For Windows systems, open File Explorer and navigate to
C:\Users\YourUsername\AppData\Local\Arduino15\packages\esp32\hardware\esp32\versionNumber; - For macOS, open Finder and navigate to
/Users/YourUsername/Library/Arduino15/packages/esp32/hardware/esp32/versionNumber.
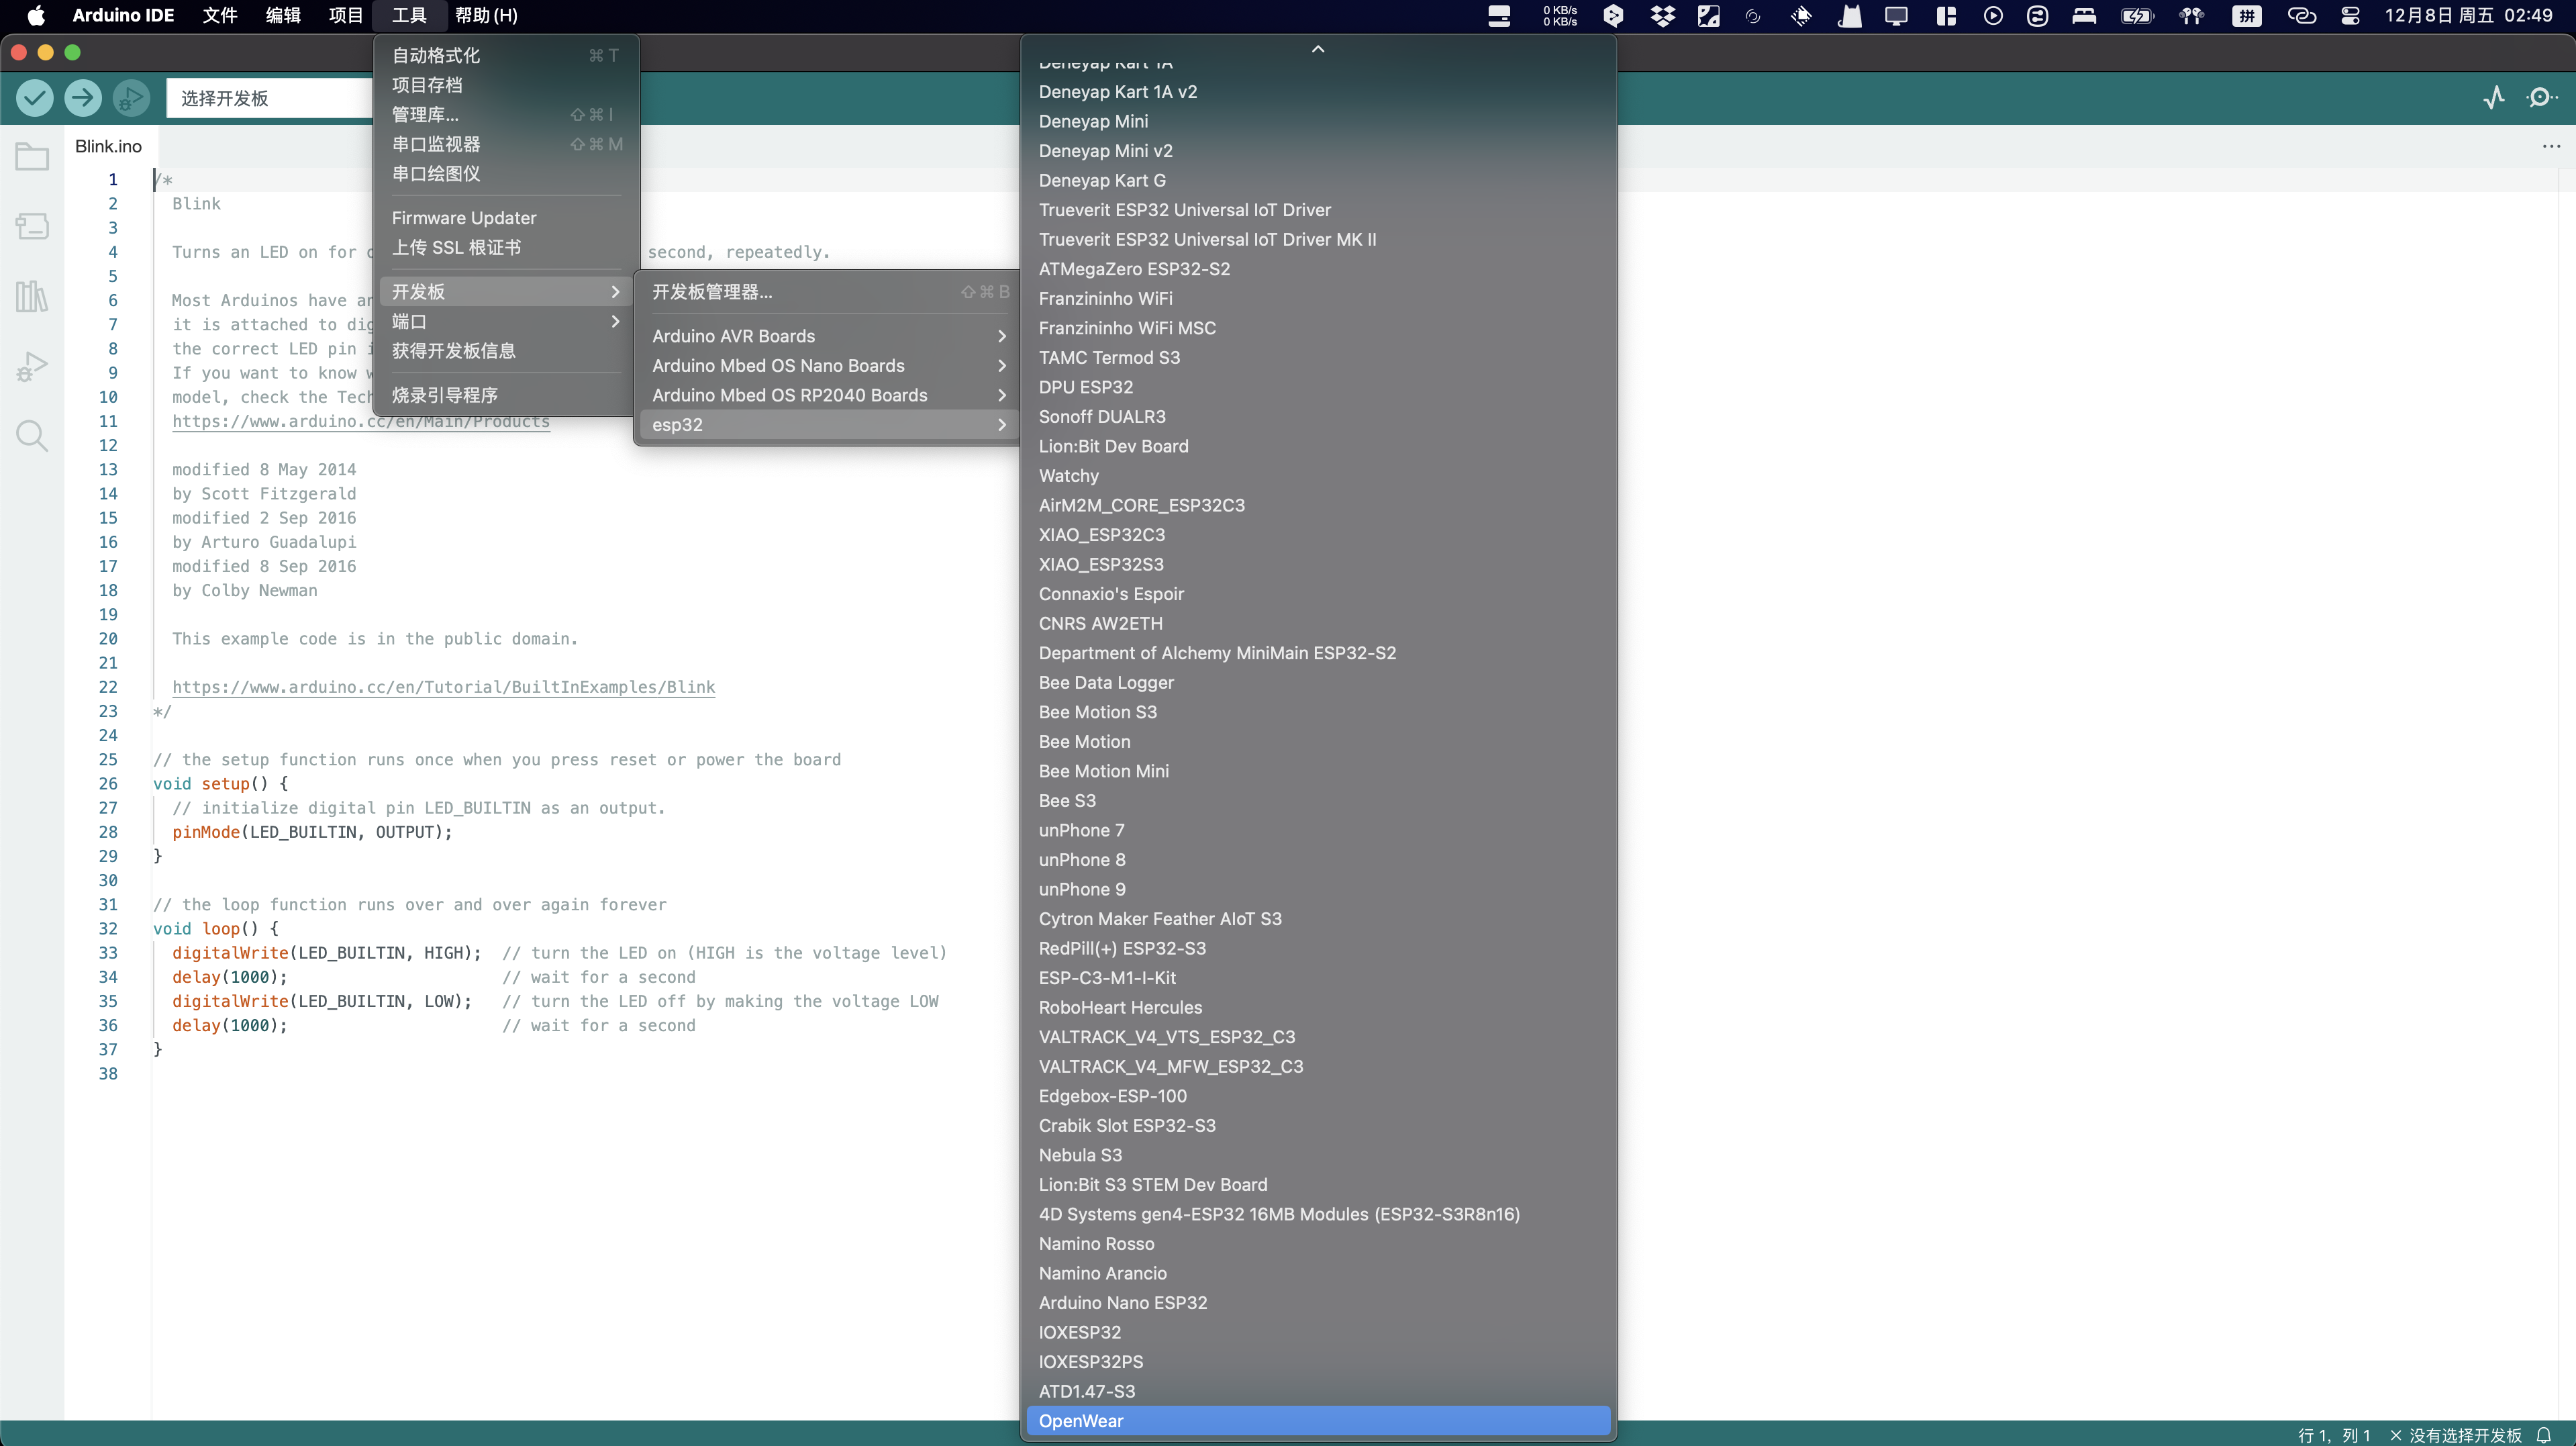
Copy the openwear_pico folder from the Arduino Board ESP32 Variants folder into the variants folder. Next, open the boards.txt file, copy the contents of openwear_pico.txt and paste them at the end of the boards.txt file, save and exit. After completing the above steps, reopen the Arduino IDE, and you should be able to find the OpenWear development board in the board list.
Using MicroPython
For users of MicroPython, please use Thonny to write and flash the code. OpenWear provides development boards with MicroPython firmware. If your development board is currently using the Arduino IDE, please flash the firmware first. You can use Thonny to flash the firmware, and the firmware flashing tutorial is here. For flashing code with Thonny, refer to here.
If you want to use the pin definitions of openwear, first refer to the Arduino section to download the Github code. After extraction, you will get the MicroPython Pin Def folder. Open the openwearpin.py file with Thonny, click File -> Save As -> MicroPython device, and save it as opnwearpin.py.
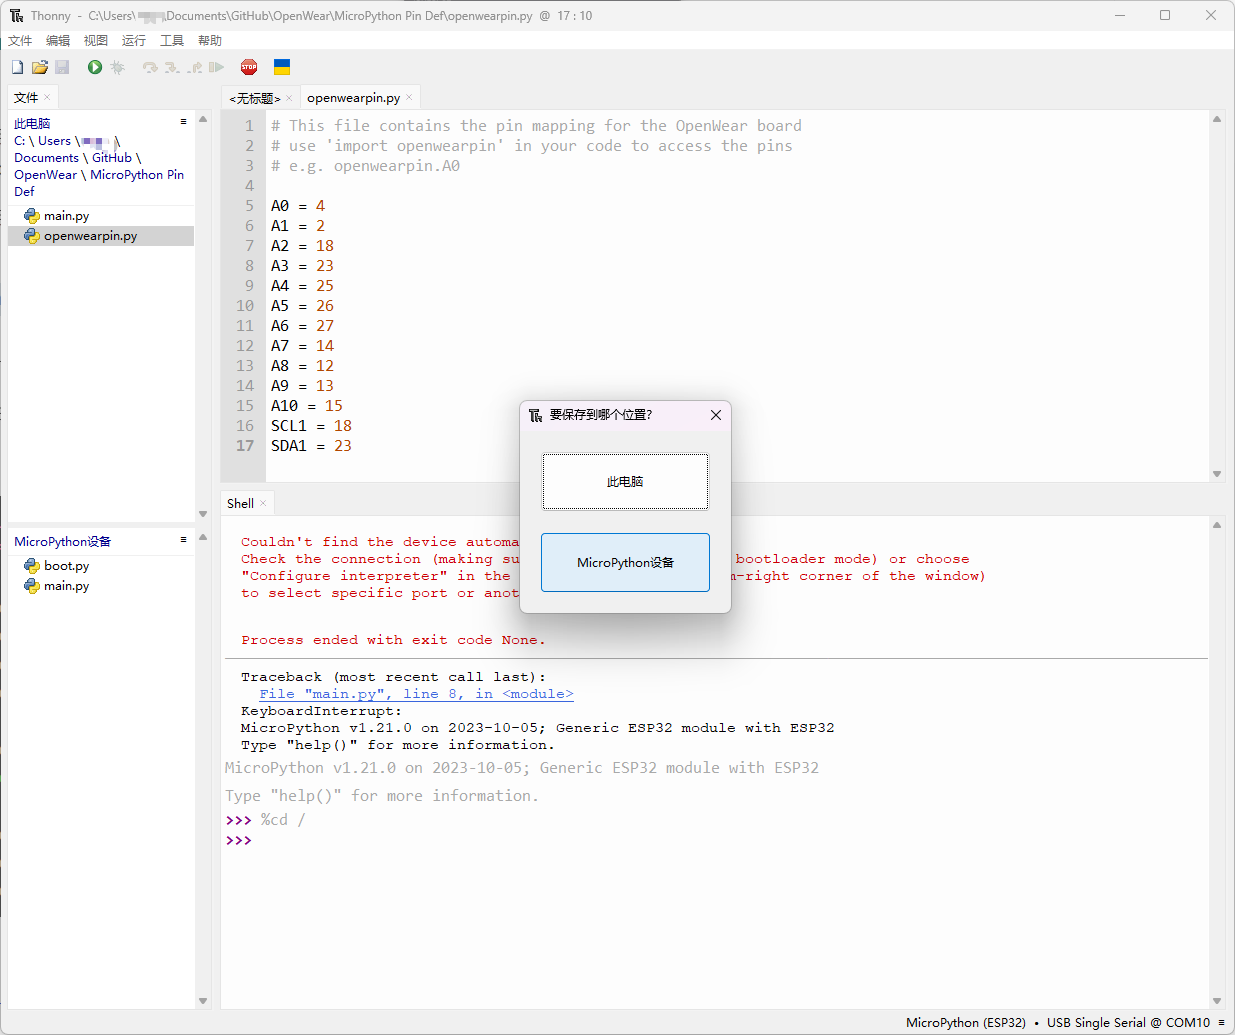
Alternatively, you can also create a new document named openwearpin.py, copy the following code, and click save.
# This file contains the pin mapping for the OpenWear board
# use 'import openwearpin' in your code to access the pins
# e.g. openwearpin.A0

A0 = 4
A1 = 2
A2 = 18
A3 = 23
A4 = 25
A5 = 26
A6 = 27
A7 = 14
A8 = 12
A9 = 13
A10 = 15
SCL1 = 18
SDA1 = 23
When writing code, import openwearpin in the main code.
Example:
import openwearpin
from machine import Pin

p0 = Pin(openwearpin.A0, Pin.OUT)    # create output pin on A0
p0.on()                 # set pin to "on" (high) level
p0.off()                # set pin to "off" (low) level
p0.value(1)             # set pin to on/high

p2 = Pin(openwearpin.A1, Pin.IN)     # create input pin on A1
print(p2.value())       # get value, 0 or 1
If you are unable to upload code after completing the above steps (especially on macOS), consider installing the appropriate drivers. Download link.